Header Logo
Where should I start?

A great place to start is our free two-week trial. This gives you access to all of our classes (mat + aerial), which lets you get to know our instructors and see if it seems like a good fit. Your free trial comes with a 20% off code for our hammock kits, so we'll get you all set if you decide you'd like to practice aerial with us from home!

I'm just interested in mat classes

Awesome! We offer mat-based options every day and our on-demand library contains HUNDREDS of mat classes in everything from yoga to HIIT to barre to restorative options. You can get started with a free mat membership trial right here. 

How much weight can the hammock support?

Hammocks are tested to hold up to 400-600 pounds safely. Typically, the strength of the location you hang the hammock will be weaker than the hammock itself. Please be careful hanging the hammock that your weight will be supported! 

Is the yoga hammock good for beginners?

YES! Aerial yoga can actually be easier than regular yoga, since the fabric acts as a support in many postures. The yoga hammock will help increase your flexibility and can help ease into yoga poses that would be difficult on the ground. If you're practicing at home, try to slowly work your way up to more difficult moves, and you will likely see great progress in flexibility and potential alleviation of back pain.

Most people are also amazed at how easy inversions are to get into and out of. There's nothing like it! 

 
Where can I hang my new hammock?

1. Loop daisy chains over a weight-tested exposed beam in your home, garage, porch, etc.:


2. Install x-mount bolts into your ceiling (we recommend two hanging points for aerial yoga, spread 16-18 inches apart):
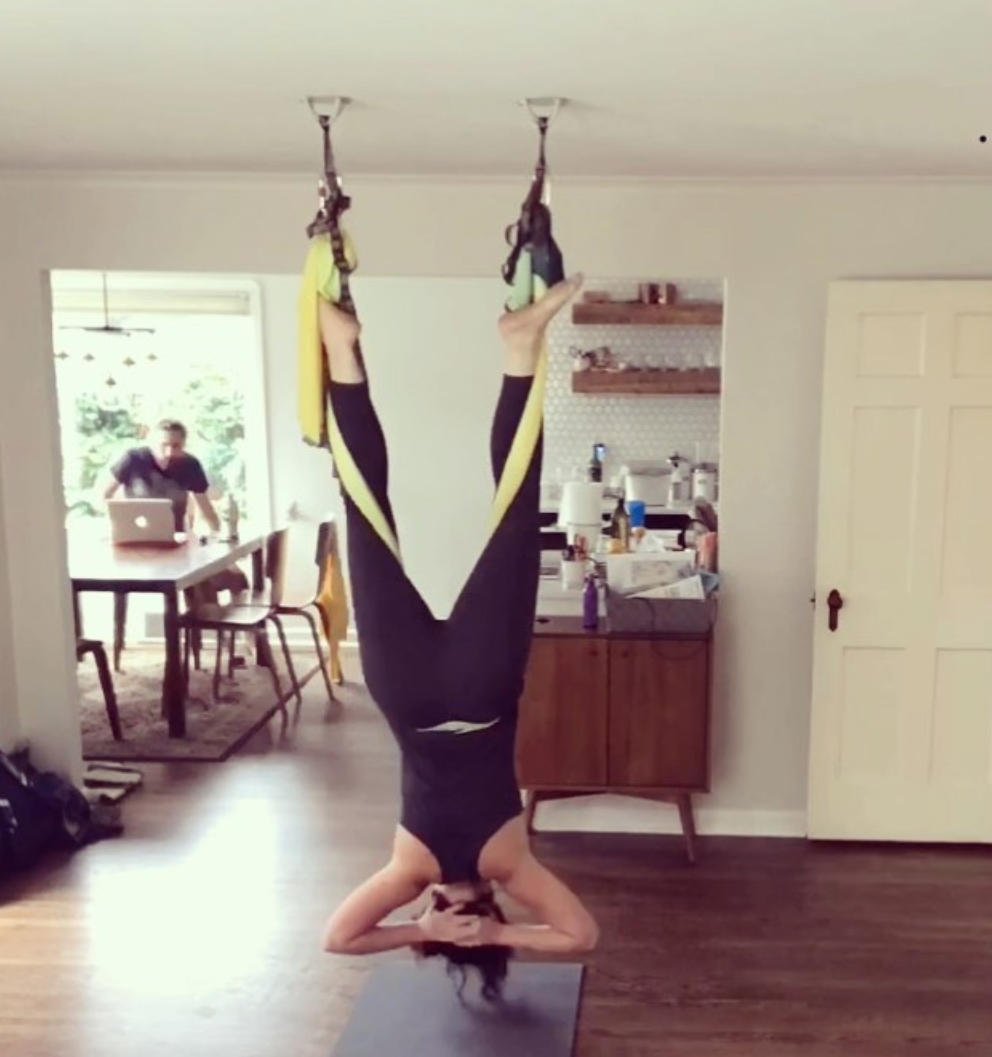


(This is me in my living room and my personal at-home set-up. I just take the hammock down when I'm not using it and the bolts are super unobtrusive 😊)

3. Purchase an aerial yoga stand. These are awesome because they require zero expertise in setting up, can be taken outside and put away when not in use. We LOVE this one by Uplift Active (they make all of our amazing aerial gear, including your new hammock kit!) but we have students who use and love much less expensive stands as well. 

4. Loop your daisy chains over an outdoor pull-up bar or swingset that can support your swinging weight. (Home swingsets can work fine as long as they have an adequate weight capacity):


5. Purchase a doorway system designed for aerial yoga/inversions (most home pull-up bars sold are not intended for users to go upside down). While these are less expensive than an aerial yoga stand, be aware your lateral movement is pretty limited: 

The most critical safety factors when rigging: 

1. Make sure that your rigging points (so, whatever you're attaching your hammock to) are able to support a dynamic load (your swinging weight, which can be several times your static weight.) We LOVE inversions at Flight Room and we want you safe when we're upside down! 

2. Any installation into your ceiling should be completed by a professional to ensure safety. 
Where should I NOT hang my new hammock?

While we LOVE practicing outside, we don't recommend rigging from a tree. It's hard to determine how much weight a branch can hold, even if it looks super sturdy.
Where can I find someone to install my new hammock?

We've had great luck with Thumbtack.com to find a contractor with good reviews. You want to make sure whomever you hire has experience with structural work so they can advise on your ceiling’s suitability for rigging. (Good news: in our experience, almost all homes can accommodate an aerial hammock. If for some reason your ceiling isn't suitable for rigging, you have a bunch of other options available to you as well.)

In the Seattle area? Jen has an awesome contractor she can refer you to. Email [email protected] for his contact info. 

Join Our Free Trial

Get started today before this once in a lifetime opportunity expires.